
Ever wondered how to Add Google Analytics To WordPress? Google Analytics is a tool that allows you to put tracking software on your websites and emails. It is important for many reasons, partially because it allows you to analyze the traffic going to your website. This information allows you to run more effective internet sales and marketing campaigns. You will be given insights to your website such as; how many visit user visits, what visitors are looking at, how long they are looking and what regions they are arriving from.
Step #1: Create A Google Account
If you have not already, you will need to create a Google.com or Gmail.com account. A Google account is particularly important because it gives you the ability to take part in the Google ecosystem of applications. Best of all, it is free and it is easy to do. All you really need to do is go to Google.com and follow the new user setup wizard.
Step #2: Create a Google Analytics Tracking Code using the Google Analytics Search Console
Enable the Google Analytics Console
To get Google Analytics working you are going need to configure, yup you guessed it, the “Google Analytics Console”. To get there go to https://analytics.google.com.
When you first get there, you will have to complete a getting started wizard.
Click “Start Measuring” when you arrive.

Assign Account Name
The first thing the wizard will ask you is to name the account; it is going to be listed as “Account details.” Put your company name there. For purposes of this tutorial we are using “DIY Marketing Lessons” as our fictitious company name.

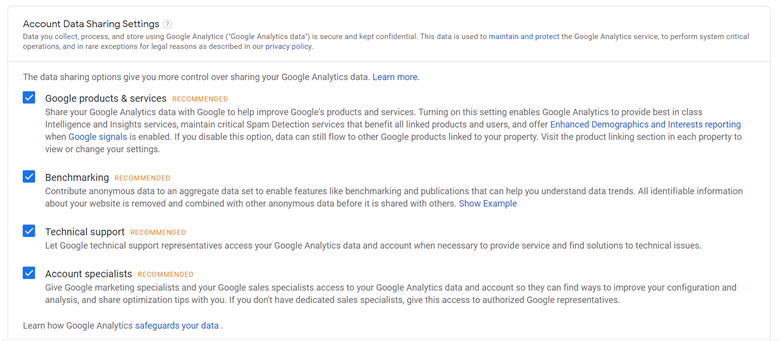
Configure Account Data Sharing Options
The wizard will ask for permissions pertaining to your online goals. Sometimes the data requests can be legally overreaching. Here it is best to check with your tech team and/or your legal team if you are concerned about any potential legal or privacy issues.
Google Search Console Property Setup
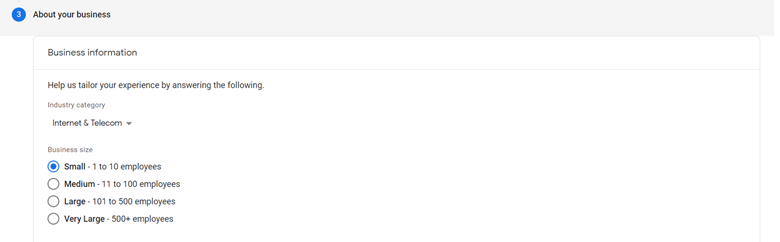
This step is where you will add your website information. The wizard asks for more some basic information about your website this time.

Enter Basic Information About Your Website or Business
Choose your business industry category. We have selected “Internet & Telecom.”
The business size we are going to select small. For both, you can select what represents your organizational size.
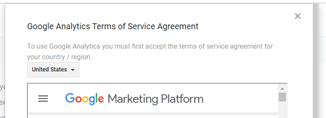
Read and agree to the Terms of Service
Once you complete the initial setup the tool will ask you to agree to the terms of use. Again, this should be reviewed with your technical and legal teams, if required.
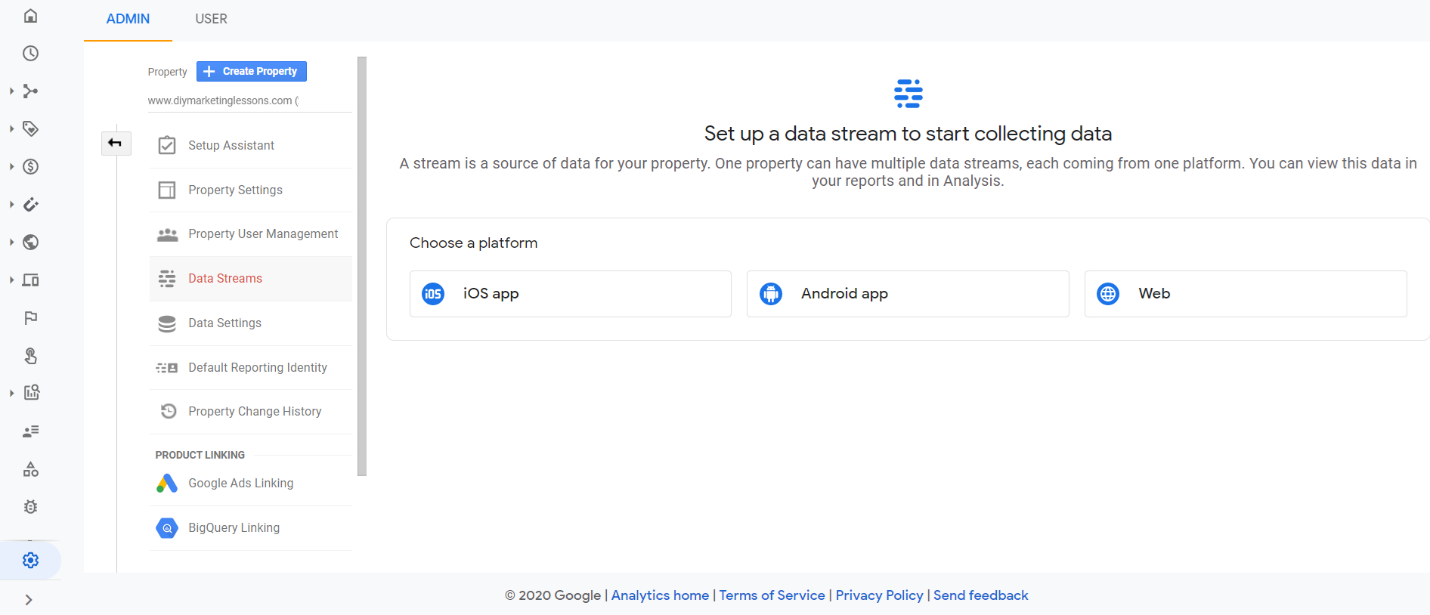
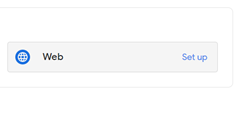
Setup a Data Stream to Start Collecting Data
Select the option for “Web”
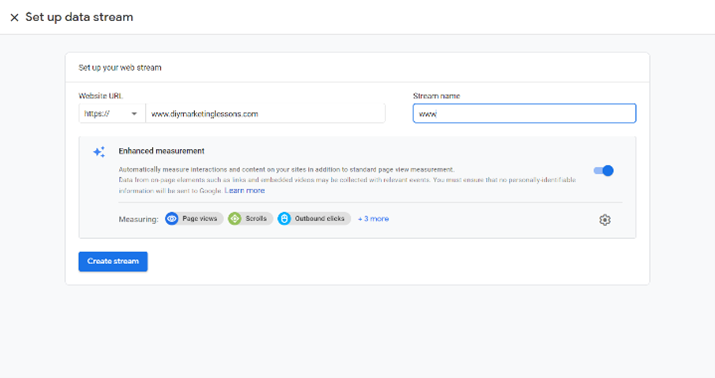
Setup Your Google Analytics Web Stream
Enter your website URL.
Note: select the correct http or https prefix option depending on your website setup.
Stream name we are going to use the name of our server “www”.
Configure web stream details
Now that you have added your property, you’re going to be brought to a screen that says says “Web stream details”. This the area where you can get your website Google Analytics Tracking Code.
The code is listed as “Measurement ID.”
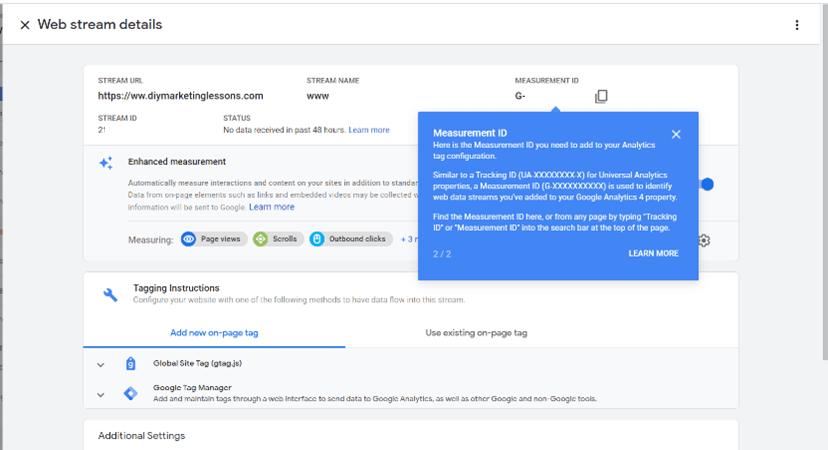
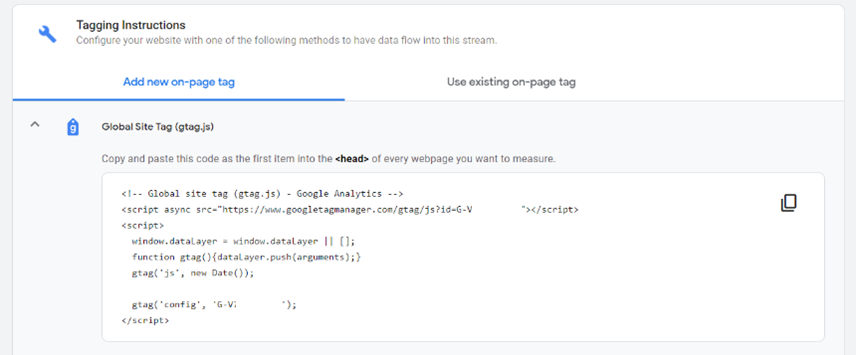
Copy Google Analytics Website Tracking Code
Step#3: Install Google Tracking code on your WordPress website
hint: This is the section we will actually add Google Analytics to WordPress.
Install “Insert Headers and Footers” Plugin
Log in to your WordPress console. In your console you are going to install a plugin called “insert headers and footers” by WP beginner.

Navigate to plugins
Click the option to “Add New”
Type the name “insert headers and footers”
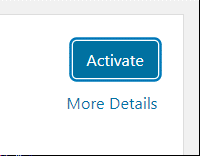
Click “Install Now”

Upload Google Analytics Tracking Code
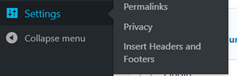
Now back in your WordPress console, on the left-hand side, navigate down to where it says “Settings.” You will see an option for the program you just installed.
- Click “Insert Headers and Footers”
- Navigate to where it says “scripts in header”
- Paste the Google Analytics Code you copied in the previous step
- Save
You have successfully completed the installation of your tracking code.
Step#4 Verify if your Google Analytics Tracking Code is working.
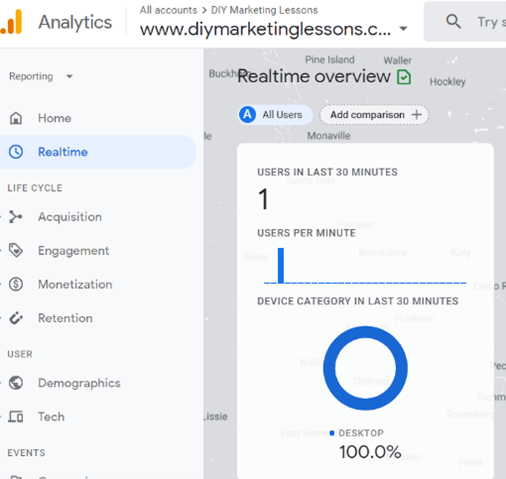
To verify the installation of your tracking code simply go back to the Google Analytics Console. There will be an option that says “Realtime.” Click it!
Next, go to your website, either on your on your computer or another device and you will see that it’s tracking your visit. How cool is that!
You have successfully learned how to add Google Analytics Tracking to WordPress.